
You may find our short FAQ for beginners useful.
This section covers various 'how-to' kind of information that I've gathered from time to time.
For now it covers :
- How to strip a JAC (and HSU WEI) Browning Hi Power (courtesy of Asher)
- How to solve a problem with the Marushin Raging Bull not releasing gas when the trigger is pulled (courtesy of Marushin).
- A FPS/Joule convertor in Excel format - Click Here to view.
- A simple guide to what you can upgrade on your gas gun for more power.
- Carbine's forum post, detailing his mods to a WA SVI and the effects upon fps of various mods.
- A guide to stripping down the Maruzen CA870
- Some research into the relative pressure of different gasses at different temperatures - When CAN you use Green?
- The TM FAMAS AEG manual - Courtesy of Indautxu.
- Various Schematics and exploded diagrams for airsoft pistols.
- A list of Airsoft Gun released since 1979 - If you can add anything to this list, get in touch.
- A guide to the UK law relating to airguns - Note this is taken from the web and I do NOT guarantee any of the information is correct or current.
- Why do WA magazines have that sliding valve plate? - The answer can be found here.
- Calculate Joules from FPS & BB weight and see estimated ranges - Link to Arnie's airsoft.
- How do you swap the triggers on a WA SVI? - The answer is here - Courtesy of Player 2 from Arnies
Stripping a JAC (or Hsu Wei) Browning Hi Power
.
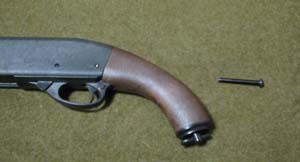
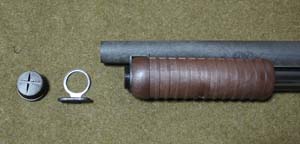
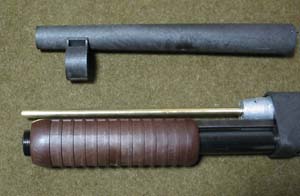
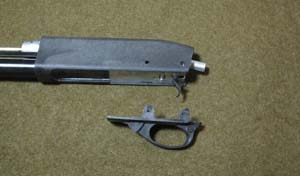
1.Take off the grips. Pull the slide back and unscrew the outer barrel,
remove the inner barrel. NB you can do this later if you prefer.
2. Push out the slide lock lever. You may have to gently persuade it from
the ejection port side using a pin punch.
3. Unscrew the (allen?) bolt retaining the safety catch and remove both
halves. BE CAREFUL: there's a little bastard of a ball-bearing that will
attempt to escape at this point (it keeps the safety in place during normal
operation).
4. Remove the frame screw in front of the slide lock and the  two frame pins
in the grip part of the body. There may be another screw that needs removal,
but IRC it's just the one and two pins usually.
5. Push the hammer spring assembly up and swing it forward out of it's
cradle.
6. You should now be able to lift the entire slide/trigger/hammer assembly
free of the frame.

Stripping the mechanism.
I really don't recommend this unless you absolutely have to do it, although
after a couple of times it becomes second nature, it can be a shocker if
you're used to WA units.
1. Remove the barrel etc (if you haven't already).
2. Push out the pin that holds the recoil spring in place and pull the
hammer/spring guide up and out of the slide
3.Undo the allen bolt that holds the piston assembly together.
4. This is the fun part. After a lot of having and rouging you should be
able to expose a small screw that holds the guide frame for the gas parts in
the slide. It screws into the rear sight. Take it out and wrestle with the
thing until you can free the mechanism from the slide body. BE CAREFUL: it's
not as robust as it looks, thanks to the joys of pot metal (TM).
Problem with Marushin Taurus Raging Bull not releasing Gas
When I purchased my Raging Bull it wouldn't fire BB's properly and I diagnosed this as gas not being released when the trigger was pulled.
I decided to contact Marushin directly (via their website - http://www.marushin-kk.co.jp/) and was rewarded with excellent customer service.
My mail was :
"I have recently bought a Marushin 8mm Raging Bull. It is a lovely gun, but mine does not release any gas when the trigger is pulled.
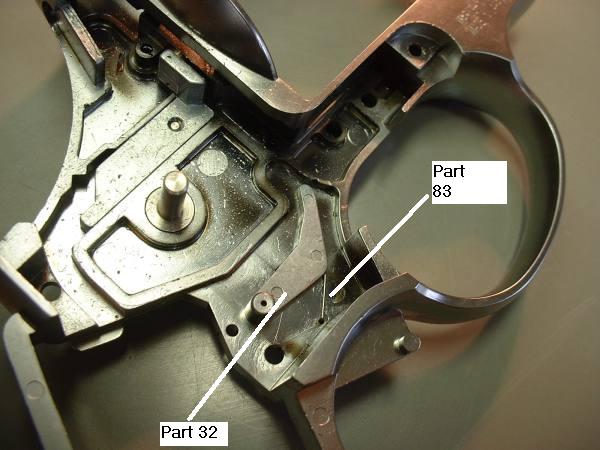
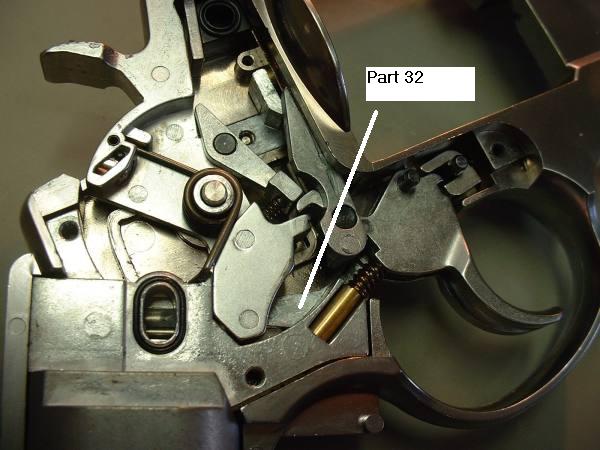
I have taken the side panel off and the problem appears to be that part 32 is not correctly positioned in relation to the trigger and the hammer. I cannot see any broken parts.
Can you give me any information on how this part is positioned, so that when the trigger is pulled gas is released?
If you can help I will be most grateful. I also own a Marushin Mauser M712, which I admire greatly and which encouraged me to buy the Raging Bull. No one in the UK (where I live) seems to know anything about your guns (a great loss to them!), so I have turned to you for help.
Marushin's response was :
We are sorry for you are in trouble.
We send you 3 photos and we wish they will help you.
"#32&83"
Please check the other side of #32.
If the shape of #83spring is like above one, it is OK.
If like below one, the spring is not working and you have to
replace new #83.
Maybe this is the reason for not releasing gas.
We can send you #83 to you for free.
If you need it, tell us your address.
The rest of photos are how to adopt #32&83.
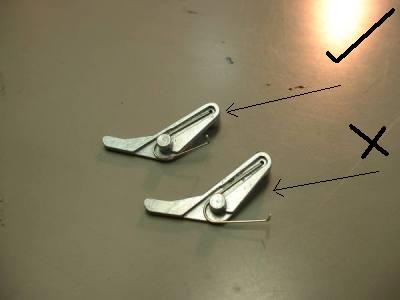
My part 83, did indeed look like the lower one and I request a replacement. The part arrived about a week after I requested and, once fitted, resolved the problem.
This was someone's reply to a question I posted on a forum, asking what upgrades were possible and their effect.
Hi flow valves release more gas per shot so it increases the power, but it also means that fewer shots are fired per magazine as it releases more gas.
Stronger hammer springs allows the hammer to hit the valve harder to release more gas from the valve also increasing the power.
For use of HFC22 reliably I'd first recommended to have a metal slide as the higher pressure of HFC22 of crack plastic slides.
This is where you need the stronger recoil spring. As the slide is now a lot heavier as its made from metal you need the stronger spring to push the slide back to the original position after each shot.
For upgrades to use HFC22, I'd definitely get the metal slide and stronger recoil spring. The high flow valves and hammer spring are optional, if you want the extra power.
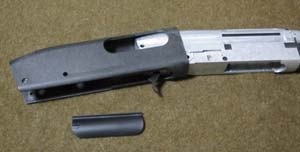
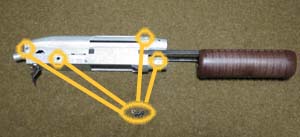
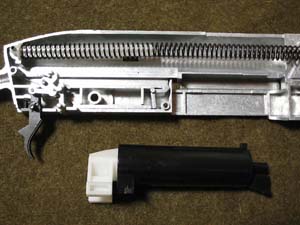
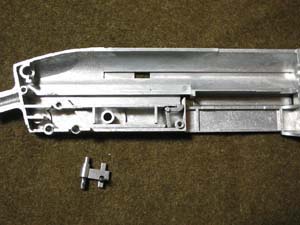
CA870 field strip - Courtesy of Ruriwo
I found this excellent site and translated it with Alta Vista and then used my gun to make sense of the instructions!
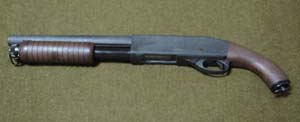
The CA870 fresh from the box.
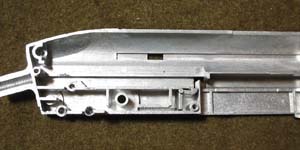
The screw of the rear grip is removed with a long handled Cross headed screwdriver and slide from the fixing tube.
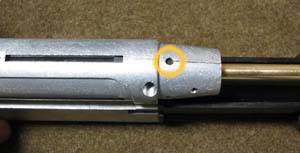
The forward magazine cap is removed by unscrewing it and the front sling mount is removed.
The outer barrel is removed, by sliding it forward off the gun.

The pin of the receiver is pushed out with a punch, the screw both sides is removed with the 2.5mm hexagonal wrench.
The trigger guard Assembly is pulled out from the receiver.
In order to remove the receiver shell slide it back from the trigger box. Dummy bolt and the trigger box are removed from the crust.

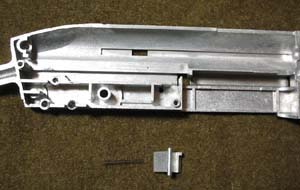
Wire locking pin in place is removed.

The metallic parts on the other side are removed. Take care not to lose the spring!
The seal is peeled and the "Brin jar" (Got me - Is it nipple?) and the spring of hop fixing are removed.
In order not to throw, please note (the box to put out with, there are times when it has entered in contrast to the instruction manual) - (No - I can't make much sense of this - Just don't lose these parts!)
Removing the highlighted metallic parts, allows you to remove the inner barrel
from the trigger box. (The magazine tube has come off already. As for method
of removing, in the following figure)
Because the magazine tube the screw drill doing, has fallen in the trigger box, turning,
you remove (errr....I think it means unscrew the magazine tube to remove it and the fixing screw will fall inside the trigger box...)
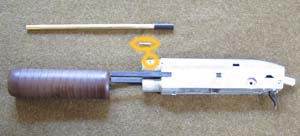
Four screws are removed with the T15 Torx screwdriver. Because the Cocking bars linked to the foregrip is engaged in the bottom of the cylinder, after a little opening of the trigger box, if the action bar is pulled and it pulls out, you can disassemble the unit gently.
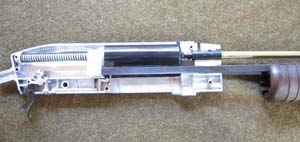
Trigger Box section immediately after the disassembling.
See enlarged view of trigger box.
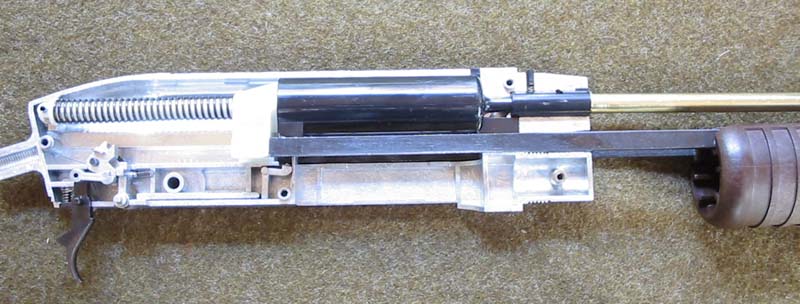
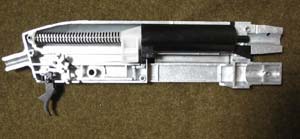
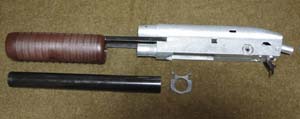
The foregrip and cocking bars linking it to the piston are removed in this shot.
The cylinder assembly is removed.
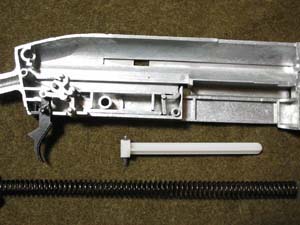
The spring and the spring guide are removed.
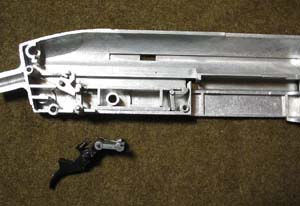
Remove the trigger shear.
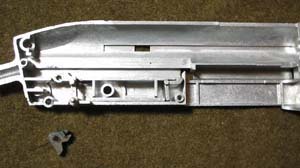
Remove the piston retention shear.
Remove the forward fall retention shear.
The part of rail condition is removed (Nope - Got me...)
The part of rail condition is pushed, the L shaped part and the spring are removed to complete disassembly.
The following was posted by CARBINE on the Airsoft Players Forum.
I have been playing around with my Tactical Carry to achieve the highest possible muzzle velocity. So, I decided to do a little testing:
Parts installed on the gun, that can affect muzzle velocity: PGC loading nozzle, Sheriff floating valve, Guarder magazine rubbers.
Aside from these, I tested the following cobinations. Below are the combos listed along with chrono data. All numbers were achieved using a Chrony model shooting chrono and shot after warming the mag to room temperature with adequate intervals. All the readings were achieved using the same magazine (WA SVI 30bb w/ Guarder magazine rubber).
All reading are in meters per second (mps) and were achieved using green gas and 0,2g BBs.
Gun with only the above modifications:
Gun with stronger hammer spring from WA P14 and above modifications:
Gun with stronger hammer spring and Guarder high output valve and above modifications:
Gun with stronger hammer spring, Guarder high output valve and Guarder enhanced firing pin and above modifications:
Thus I can conclude:
-Enhanced firing pin will only add stess to the magazine valve, but also eliminate the chances of a "light strike". (None were experienced during the testing in the first place though)
-Hi-flow valves add around 5-10% in muzzle velocity, depending on the other parts installed
-A Stronger hammer spring alone will add around the same amount of muzzle velocity as a hi-flow valve, but is cheaper to buy, easier to install and only one is required. It will also eliminate light strikes and make the GBB function better in hot temperatures.
As for the Sheriff floating valve and the Guarder magazine rubbers, I don't think they add much velocity, but rather contribute to the overall gas efficiency and function of the GBB.
-Carbine
http://www.juoksuhauta.net
A list of airsoft releases since 1979, can be found here.
The list originated on the Classic Airsoft forum, as a post and I've added more recent releases to it.
Specific models (eg. Black and Silver TM Desert Eagles or various WA SCW 1911s) are not covered, rather 'families' of
models (so the 1911 SCW range and the TM Desert Eagle Hardkick).
If you have a Western Arms or some Tanaka or KJW magazines, there is a sliding valve plate on the gas release valve, which must be pushed down, to let the
valve close, before filling with gas (99%+ of people don't know this first time they fill a WA magazine - Mea culpa!).
Infyrana posted this excellent explanation on ASCUK.
When the firing pin hits the valve, the sliding valve plate goes up and keeps in the outlet valve allowing gas to constantly escape. When the slide goes back enough, the blow back units' indentation pushes on the plate slider catch and pushes it down (that's the one you see on the top of the hammer mechanism when you remove the top slide). So once the slide has gone back far enough to recycle the shot (and thereby having enough movement from the gas to recock the hammer and load in another BB) the valve plate gets pushed down unlocking the outlet valve allowing the gas to be shut off.
This is how the WA's always get sufficient gas to make a full slide cycle even when low on gas - unless it's either very weak gas or there's nothing left - in which case it will lock open and stay letting the gas out, and then you know you're done.
WA's are consistent for a reason!
It's kind of "backwards" but you have to actually screw the tiny allen bolt into the trigger until it has passed through the back of the trigger piece that you want to swap out.
Keep screwing the bolt clockwise until you can press the trigger piece out from the side then slide the new trigger piece into place and screw the bolt anti clockwise to secure the new trigger. Worked fine for me but you can't squeeze the trigger when you've screwed the bolt in as it must get in the way of something.
Upgrading a WA SVI and the effects on velocity
85,4
84,5
85,0
90,2
91,1
91,2
95,5
94,7
95,8
94,4
94,2
93,8
Airsoft Releases since 1979
Why do WA Magazines have that valve plate?
How do you swap the trigger on a WA SVI?
Back to the Homepage